Hirens Boot CD a.k.a HBCD is a popular bootable CD that includes various diagnostic programs like BIOS tools, Partitioning agents, imaging, and disk cloning tool, system performance benchmarks, data recovery, imaging tools, MBR tools, and other useful tools to fix various computer issues. You can take advantage of this useful Windows repair tool when you’re not able to boot into your Windows PC. Hirens BootCD is a bootable utility for Windows operating system. Now what that means is that you can not install it on your computer just like any other standard program. You need to burn it to CD/DVD or a USB device. The 21st century is about USB devices, no one like to use CD/DVD. By keeping this thing in mind, I decided to write this post sharing steps on how to create Bootable Hirens BootCD USB for Windows 10. What you’ll Require
Create Bootable Hirens BootCD USB for Windows 10
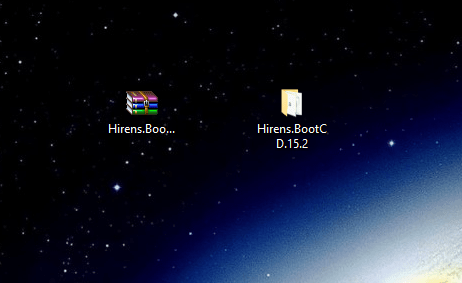
- Extract the zip file using Archiving tool. You will get Hirens BootCD folder.
Inside, Hirens BootCD folder there is ISO image with the same name and its size is about 609 MBs.
- Run the Rufus tool. The link to download Rufus is already available in the What you’ll require section.
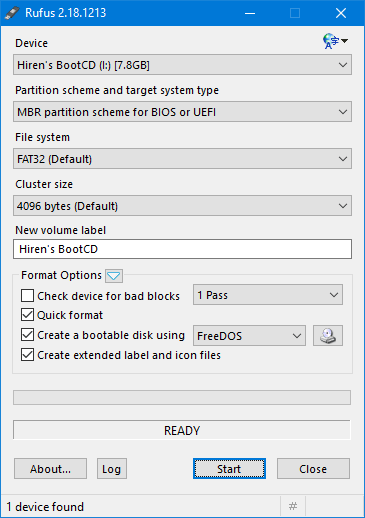
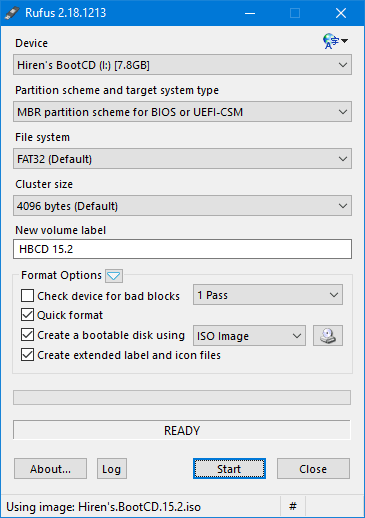
The above Rufus window will appear. 3. Now plug in the USB drive. This is how the Rufus window will look like:
If there is any data on the USB drive, then copy it somewhere else because in upcoming steps all the data on the USB drive will be formatted. Make following changes in the Rufus tool window:
Device: Select USB Drive Partition Scheme: MBR Partition Scheme for BIOS or UEFI File System – FAT32
Format Options, here check the boxes for:
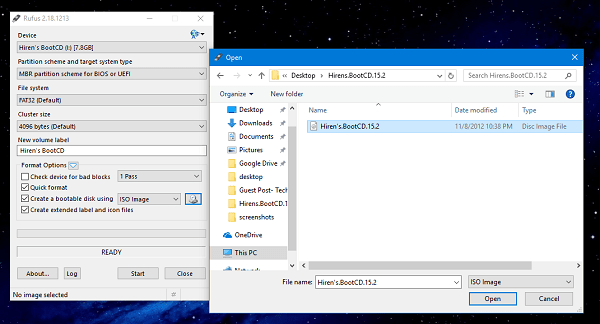
Quick Format Create a bootable Disk using. Here click the drop-down and select ISO image and click on the browse icon and select Hirens BootCD ISO file. Create extended label and icon files.
This is how the Rufus window will look when you done with all the final changes. 4. Once done with all the changes you will see the Ready status it is a signal that you’re ready to go. At this point, you need to click on the Start button.
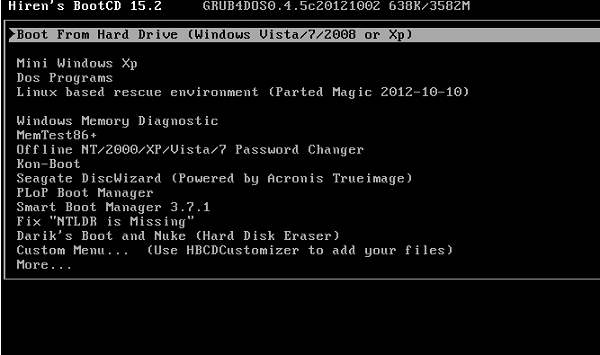
This will start the process of creating the bootable USB of Hirens BootCD. 5. Once the process is completed, you can eject the bootable USB. You will be left with bootable USB of Hirens BootCD. 6. To confirm whether it is working or not just plug in the USB drive and reboot the system 7. Press the keyboard keys to bring boot selection menu. Here select the USB drive which you have created in above step. If everything goes right, you will see the list of the various tool on a black screen. Just like shown below:
If above screen appears, it confirms that you have successfully created Create Bootable Hirens BootCD USB for Windows 10. You can also check YouTube for more idea:
Need any assistance let me know via comments.